![]() Getting Started for Macintosh/Windows Midi Quest Owners
Getting Started for Macintosh/Windows Midi Quest Owners
This tutorial is for people who already have experience with Midi Quest either on a Mac or Windows system. The intention is to provide the steps to get started without including as much explanation about why the app is doing what it is doing.
1. Start by tapping MidiQuesti to run the app.
![]()
2. Tap the '+' button on the button bar. This will display a list of instrument modules available for download from Sound Quest's web site.

3. Select an instrument module to install and press the OK button
4. Midi Quest will download the instrument module and install it.
5. If the instrument supports multiple memory configurations, a list is displayed prompting you to select the desired configuration. In the case of the Kronos, there is a single configuration but here is an example from the Alesis QS series of the list of options. It will be different for every device.

6. Midi Quest creates an instrument in the Studio

7. Repeat steps 2 through 6, if desired, to install additional instrument modules and create instruments. This step can also be performed at a later time.
![]()
8. Similar to Mac and Windows, the instrument now needs to be configured with the correct information so that it can correctly communicate with the MIDI hardware. Select the instrument in the Studio View so that it is highlighted and tap the Settings button.

9. This displays the Settings dialog. Assign the MIDI IN and MIDI OUT Ports. Set the SysEx channel if the MIDI hardware uses one and set the MIDI channel that the instrument is using for communication. (Note: it was not possible to have the Kronos connected to the iPad and perform a screen capture at the same time. If it were, there would be an additional pair of MIDI IN and MIDI OUT ports for the Kronos and these ports would be selected in the dialog.)
10. Tap the OK button to accept the changes.
![]()
11. Tap the instrument module to select it then tap the Get button to load all of the SysEx components in to Midi Quest. This will display the familiar MIDI Receive window which tracks the progress of the SysEx as it is received.

12. To optionally save the received SysEx, tap the disk button and use the dialog to name the SysEx if required.
![]()

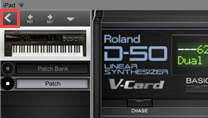
13. Once the SysEx has been saved, double tap the instrument image to open the instrument editor and begin editing.
![]()
![]()
![]()

14. A two finger tap on a position not containing a control will display the view's context sensitive pop-up menu.
![]()
![]()
![]()

Use the back entry to return to the Instrument View. From there you can repeat the process to install additional instrument modules and save SysEx as required.
For standard instrument editors, the first button in the Instrument editor's button bar is the back button. Tap it to close the Instrument editor and return to the Studio view.